Friday, 7 December 2012

socks


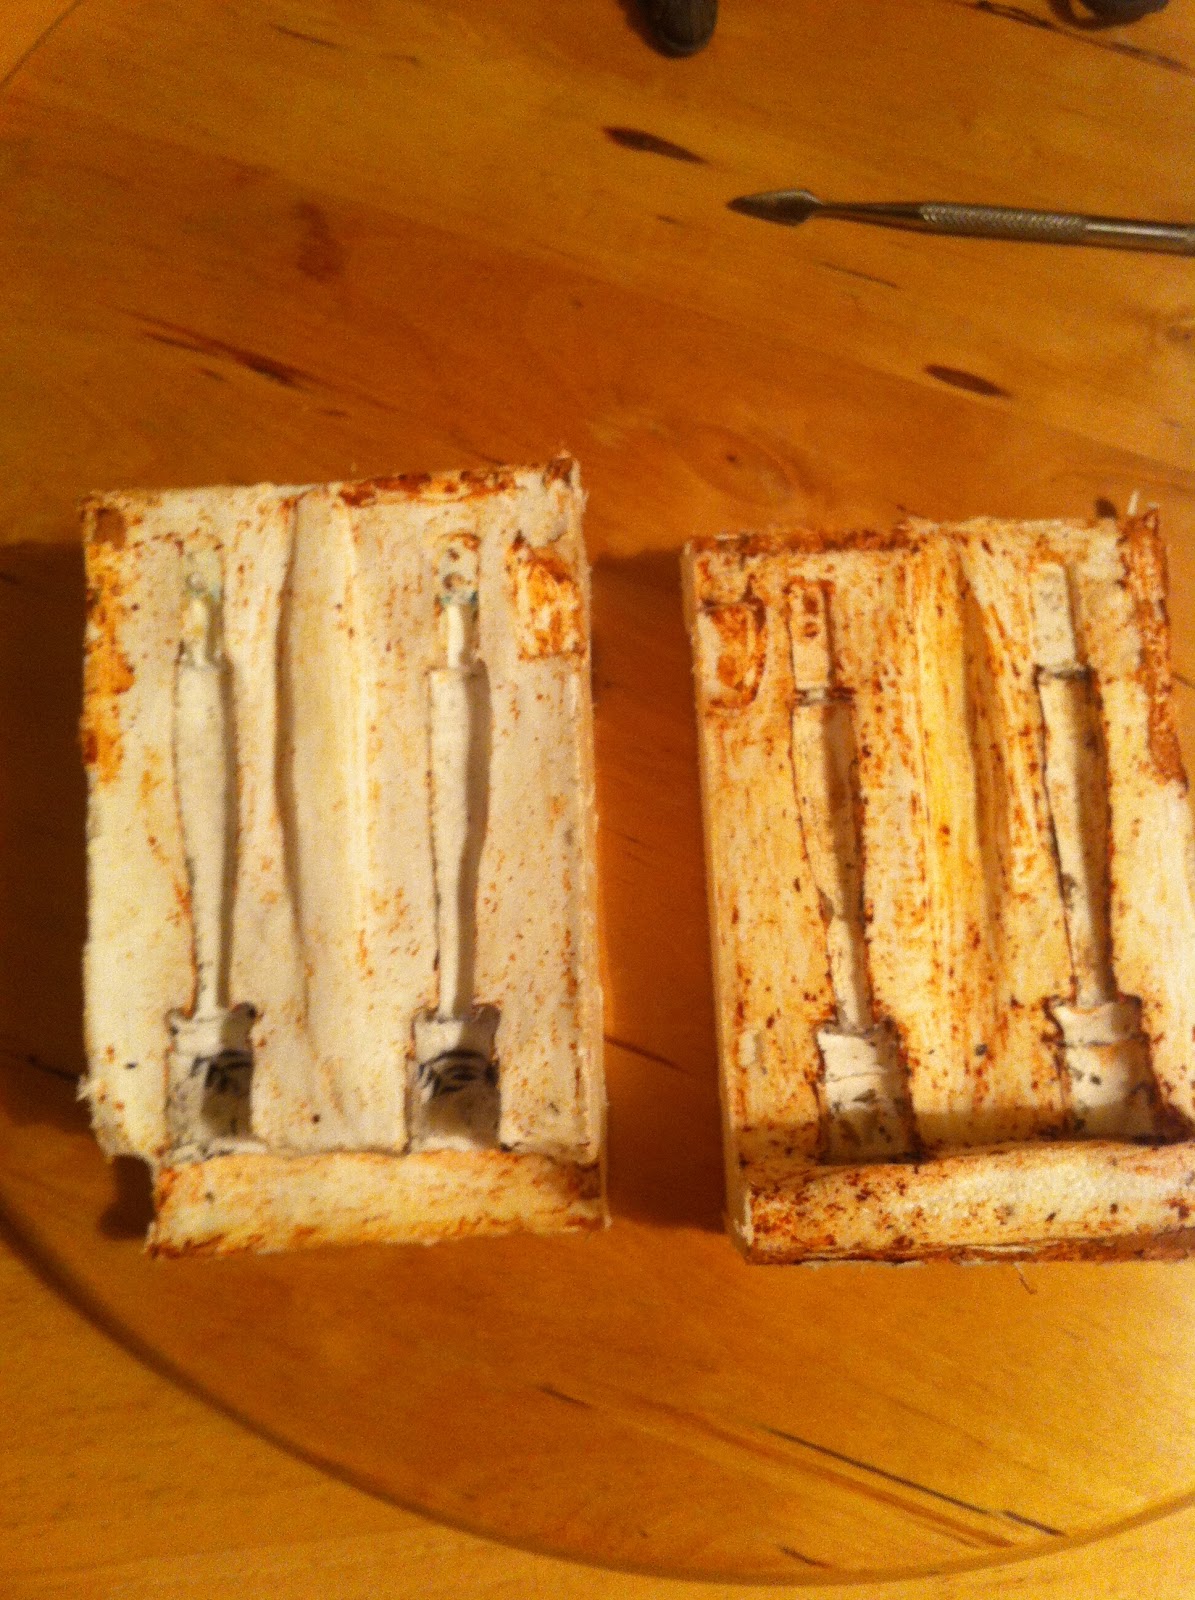
This is a really quick update before i go to work. These pics are of the socks that i had to cast second on top of the leg. They may need neatening up but basically the next stage will be to cast the shoes in black silicone, not sure if im going to do the laces in a different colour or not, may be to tricky.  


Thursday, 6 December 2012

treeeesss!

I have now made a start on the set and some props that will create the scenery. I think i have started most things now, oh well, it keeps me moving. This post is about the trees. I was thinking hard about how i want the set to look, i would of loved to create something with as much detail as something like Aardman's Pirates for example, but i thought that doesn't really go with the theme of the story and will make the characters look out of place. So, i thought round shapes or curved lines and bright colours, simple but effective. Below are a few quick drawings i did of some trees and how i thought they should look.


With some ideas down on paper, (or in this case, on the screen) i found it much easier to visualise how i want the trees to be. The next problem was, how am i going to make them? They need to be fairly big which creates a problem for the weight of them, i could of sculpted them and then made moulds and cast them in plastic but due to the size i decided not to go with that idea. With the help from my girlfriends recent activity in making cake pops, i stumbled upon oasis. This stuff is usually used for arranging flowers. I bought a dense block which i can only describe as a softer and maybe slightly crumblier version of styrofoam. This oasis though is very easy to carve and very lightweight.


The pic below is not a great image but basically i have carefully, using a range of different scalpels, carved away at the block. This does leave some fairly strong lines where the chunks have come out. 


But because oasis is soft its very easy to sand down the a nice smooth finish, obviously its not going to be a shiny surface but it has a great texture and i think will work great as a tree.


To mix things up i also bout some round balls made from the same oasis stuff. With these i have joined two together using a cocktail stick covered in superglue. These will be round trees.


To make the trunk i sculpted plastiline onto a bamboo stick and added some texture to act a bark. Again its not the best image, but basically the bamboo sticking out the top of the sculpt will be pushed inside the oasis tree and the sculpted part of the trunk will act as a stopper, so the trunk can only go in so far. I then made a mould of the trunk by putting it inside a cardboard tube and pouring in thick moulding silicone.


These are the trunks cast in plastic ready to be trimmed and painted.


new silicone


OK so i had a little break on the legs, i wasn't feeling it and wasn't happy with how they were coming out. I didn't want to waste anymore materials on making a new mould either.
I decided the mould looked fine, it could do the job for now anyways. I went back to looking for a new silicone product, what i found is really frustrating. If only i had bought this product first, everything would have been all sunshine and daisies. Anyways, i bought a silicone called dragon skin, i had seen it before but i think because of its viscosity i was detoured. I cast the legs the other night and mixed in some of my pigment and the legs came out wonderfully. Bellow are some pics of these legs.


I only wanted the legs to be casted because the boy will be wearing socks and shoes. I had to try bung up the bottom of the legs around the ankles, this stopped the silicon from flowing into the shoes. This can be seen on the pic below, the grey plastiline in the mould.


And this is how they came out. i am really impressed with the dragon skin silicone, it looks really solid almost and is not soft and squishy like the Eco flex silicone i used to use.


I have the socks being moulded at the moment so when they are dry i will pop the legs back in the mould and hope this process works. Ill get some pics done and post them up when i can.

Sunday, 25 November 2012

legs re-moulded

my other pair of legs that i sculpted went a bit wrong when i came to moulding them, so i made some more.

second time around, i think they are a bit better than the last ones.


tried a different type of clay too, terracotta, it smooths a lot easier than the grey clay.


the mould just needs to be cleaned up, i will do a test cast to make sure it works.


Tuesday, 13 November 2012

quick update

this is just a really short update but ill do more tomorrow, i hope. i have found that the face parts don't feel to secure when they're on the head, so i added a couple of extra magnets onto the core.


to make the magnets effective i had to add steel tacks into the face part so they line up with the positioning of the magnets. i can confirm that this works and i can now hold the head upside down in confidence.

Tuesday, 16 October 2012

sculpting the legs

for a couple of days i have been sculpting the legs, i have been using medium hardness plastiline, much better that plasticine. bellow you can see the legs.


nobly knees


bellow i have started sculpting the shoes. i started off with the socks, the idea i had was to make quite big shoes and skinny legs.


getting some form to the shoes


i made sure i made everything in pairs so each shoe should be roughly the same.


adding more shape and padding out the shoe


bellow i have added the tongue and a bit of trimming to go around the tongue.


finally i added soles and some more trimming to connect the soles and some shoelaces!


starting to create the mould.


Thursday, 11 October 2012

been productive!


well it has been a couple of months since my last post, i kind of lost the flame after going on holiday and having time off, been playing a lot of golf.
i thought, today being my day off, what better time to get back into my project. it felt like i had never been away. got straight back into it. 

firstly i trimmed off the flashings around the hands i moulded a while ago and put them onto the armature. one of the hands was a bit patchy but i think they look quite good on camera. so heres a couple of pics showing them off.


next up, padding out the body. i cut a section of memory foam that will reach from the front to the back, going over the shoulders in one continuous piece. i then cut a groove in the middle where the shoulders will be to allow the shoulders to be set deeper in the foam. 


then to get the two halfs to stick together, dab dipping latex on both sides, only a small amount though. leave it for a few minutes and this will get a bit tacky.


pop the armature inside and fold the foam over.


et voila, give the whole thing a squeeze and pinch the sides, this will help the latex stick. wheres a few pics of how its all adhered.


to get the sleeves on i cut a few strips of memory foam to find a matching pair. i applied them to the body using the same techniques as before, a small amount of latex and pinch the parts together.


did the same for the shorts.


the foam was to big and balky so i trimmed it down and gave the body a bit more of a shape and definition. the next step will be to pop the clothes on. 


in my next post i will sculpt the legs, i have wrapped the joints in plumbers thread tape. this will stop any clay or silicone clogging up the joints and creating problems. it works quite well for movement, more so than shrink wrap as this can be quite rigged.